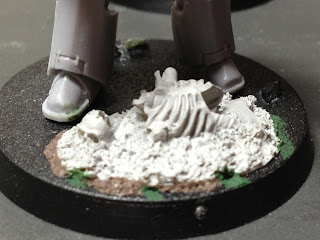
So today I'm going to talk about my experience using the Badlands basing kit. I had bought the Warhammer 40000 basing kit several years back but never really used it until now so some parts from that kit will be making an appearance as well.
Interestingly the kit I have from a couple of years back has two differences from the new kit. First is the packaging. The Badlands kit comes in a smart snap pack rather than the cardboard pack from yesteryear and the parts are in plastic bags rather than the tubs they used to come in. Secondly...
...and more importantly the resin used in making the parts have changed. The old Resin (Bottom) is much darker and clearly of a different type than what is being used now. I found the old material much harder to work with than the newer one, being harder to sand down and generally being less malleable. Another difference is the smell! Its hard to describe but the older parts have quite a horrible smell to them, especially once you start sanding them. Having looked at the GW site it would seem that the old kit has now been updated to use the newer material, can anyone confirm this?
Anyways back to the kit itself.
Inside you'll find;
- Some Grass tufts
- A bag of small rocks (also different to the Slate found in the older kit which in my view was superior modelling wise)
- Two bags of resin components
- brass etched Palm leaves and dessert bushes
Onto the Resin components.
There is a nice selection of parts in the two bags with both 40K and Fantasy specific parts as well as some generic skull pieces
Quite a few of the parts are clearly designed to fit squarely on to certain bases. I'd prefer more smaller parts personally but it shouldn't be too much trouble to trim down the existing bits to get what you need. Also there are a lot of Tomb Kings specific parts with this kit which are no use to me but awesome if you collect them (I might still try and incorporate one of the scarabs onto one of my bases somewhere as they are so cool looking!). It would also appear that most of the parts are from existing plastic sprues and have been assembled on to a base before being cast up and sold. It has ocured to me that I could probably do this myself using parts from other kits. Convenience wise they are still very useful as my bits box is a bit short on anything not Space Marine.
When using the resin parts you'll find that it is best to sand the bottom of the part down considerably so as ensure that it will sit flush with the base. I used superglue to secure it to the base before using Brown Stuff around some of the larges edges to blend the part with the base. I used a cocktail stick to texture the brown stuff before finally applying some liquid Green stuff here and there on some of the smaller edges to again help smooth the joint. Once I've painted the base with the new texture paint from Citadel the edges should be hardly noticeable.
I couldn't use the Brass details that came with the bad lands kit so grabbed an imperil eagle from the 40k kit instead. I put a blob of Brown stuff on the back of the eagle and pressed it down at an angle so as to get some elevation before applying some more Brown stuff around the edges and over parts of the eagle. I again texture the brown stuff using a cocktail stick. The idea was to make it look as if the icon was only partly sticking out from the dessert floor.
Here's a picture of the squad wit the bases ready to paint. I haven't added all that many parts yet as I don't want to distract from the models themselves and I'm still gonna need a load more parts for the rest of the army. Next time Ill be painting up the bases aswell as adding the final touches.
Until then!


Nice review. I have always wanted to know in detail what was inside these packages. Again, nice. ^^
ReplyDelete